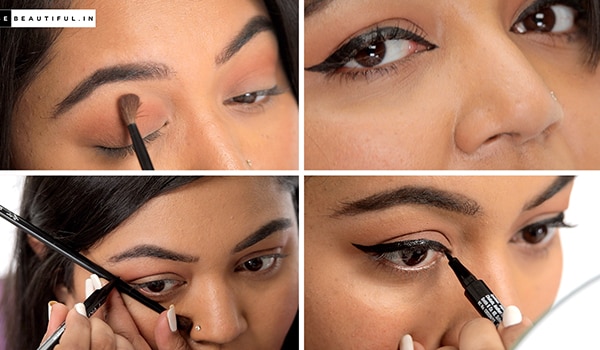
Winged eyeliner or cat-eye liner has been incredibly popular, yet many find it hard to ace it. But the truth of the matter is that it’s surprisingly easy! In fact, we have a step-by-step guide to help you achieve the winged eyeliner of your dreams. However, before you learn how to perfect this feline flick, understand your eye shape, get the right tools and don't forget to take a DEEP BREATH!
P.S. Watch the video to ace this technique.
Step 01: Prep Work
Begin by prepping your eyelids with a little concealer. The concealer acts as a base and at the same time, helps hide discolouration or veins. Ensure you set the concealer using some loose powder.
Step 02: Add some colour
Now this step is optional. However, I find that a neutral colour in my crease area helps the liner pop. It’s especially important for those with hooded eyes, as it helps define the crease of the eye.
Step 03: Wing it
Now there are a whole host of eyeliners available in the market, ranging from liquid to gel to felt-tip. I personally feel that if you are a beginner, opt for a felt-tip eyeliner as it is designed to control the flow of the product, which will in return help you achieve precision. Before you begin the application process, take a brush and place it in a slanted position on the edges of the eyes to measure the final length of the wings. Once you’ve decided what that is, make a dot.
Now start tracing a line from the inner corners of the eyes till you reach the centre of the eyelids. Then draw a slanted line from the edge of the eye till the dot. Lastly, drag the line backwards from the dot and join it with the rest of the eyeliner. Repeat the same on the other eye. In case you feel that your lines are crooked, fix it with a little bit of concealer and a tiny eyeliner brush.
Step 04: Finish Off
And last but not the least, apply a few coats of mascara to amp up the overall eye look. Easy right? Try out this method to apply that winged eyeliner and let us know how it turns out.


 Privacy Notice
Written by Niyati Sharma on 9th May 2020